01 - Kubernetes DNS - basics
Overview
Applications deployed inside of Kubernetes can communicate between each other via Kubernetes pod network (also called cluster network). Kubernetes contains and manages this internal network to make communication inside of cluster easy.
Applications are deployed as Pods. Each pod will get an IP adress and DNS fully configured automatically without the need for the user to do any additional configuration. This IP and DNS is valid for all communication inside of cluster. For DNS we use name of pods and services. You can display pod IPs with kubectl get po -o wide
kubectl get po -o wide

NAME                       READY   STATUS    RESTARTS   AGE   IP            NODE          NOMINATED NODE   READINESS GATES
nginx-7bb7cd8db5-abcde     1/1     Running   0          3d    10.244.1.12   worker-node   <none>           <none>
api-5fd5b67f78-xyz12       1/1     Running   2          12h   10.244.2.34   worker-node   <none>           <none>
db-0                       1/1     Running   0          5d    10.244.1.5    worker-node   <none>           <none>
Kubernetes Networking
Container to Container (inside the same Pod):
- communicate via localhost (containers share the same network namespace)
Pod to Pod communication:
-
Pods in the same namespace:
- communicate using podname
-
Pods in a different namespace:
- communicate using podname.namespacename.pod.cluster.local
Tip
For more information about DNS (for Services and Pods) look inside the kubernetes documentation.
Never contact a pod directly
Remember, pods are ephemeral. Pods can be destroyed and recreated at any time. This is what makes Kubernetes so robust and reliable. Intenitonally killing pods at random time in clusters is called chaos engineering, popularized by Netflix.
Always contact a service
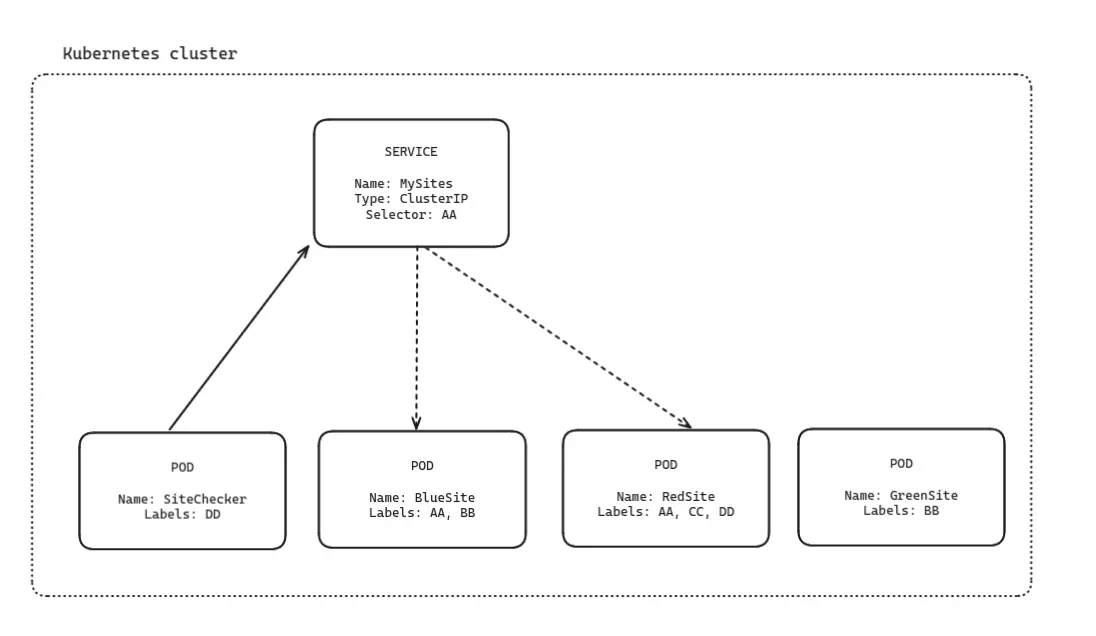
Services are an abstract Kubernetes resource that helps users solve the fact that pods are not stable at all. Pods are created with a number of labels (usually specified in the deployment resource that creates the pods). Service is a kubernetes resource with DNS and cluster wide IP automatically configured. A service also has a label selector defined. All the traffic that the service recieves is send to pods with labels matching the configured selector.
The SiteChecker pod wants to download the site exposed by the Site pods. It contacts the MySites service. The service sometimes send the request to BlueSite pod, sometimes to RedSite pod. It never sends the request to the GreenSite pod, because it does not match the labels.
How it works
Lab excercise:
To simplify the lab, we have prepared a set of mock resources for you to apply.
1. Apply the bootstrap.yaml
- You can apply the bootstrap.yaml via local terminal with your Kubeconfig. Check our Documentation.
- OR you can use LiveOps for each deployment.
- After you are connected to your cluster via terminal, apply the bootstrap.yaml with command (edit the way for you file)
kubectl apply -f ~/way/to/bootrstap.yaml
2. Look in LiveOps
- You will see 2 pods in the default namespace, one will be our terminal, second one is an nginx nameserver - see 2 pods in Image A)
- You will also see one service of type Cluster IP - service that exposes pods interally inside kubernetes cluster. Our service is called 'test-nginx" and exposes the nginx pod - Image B)
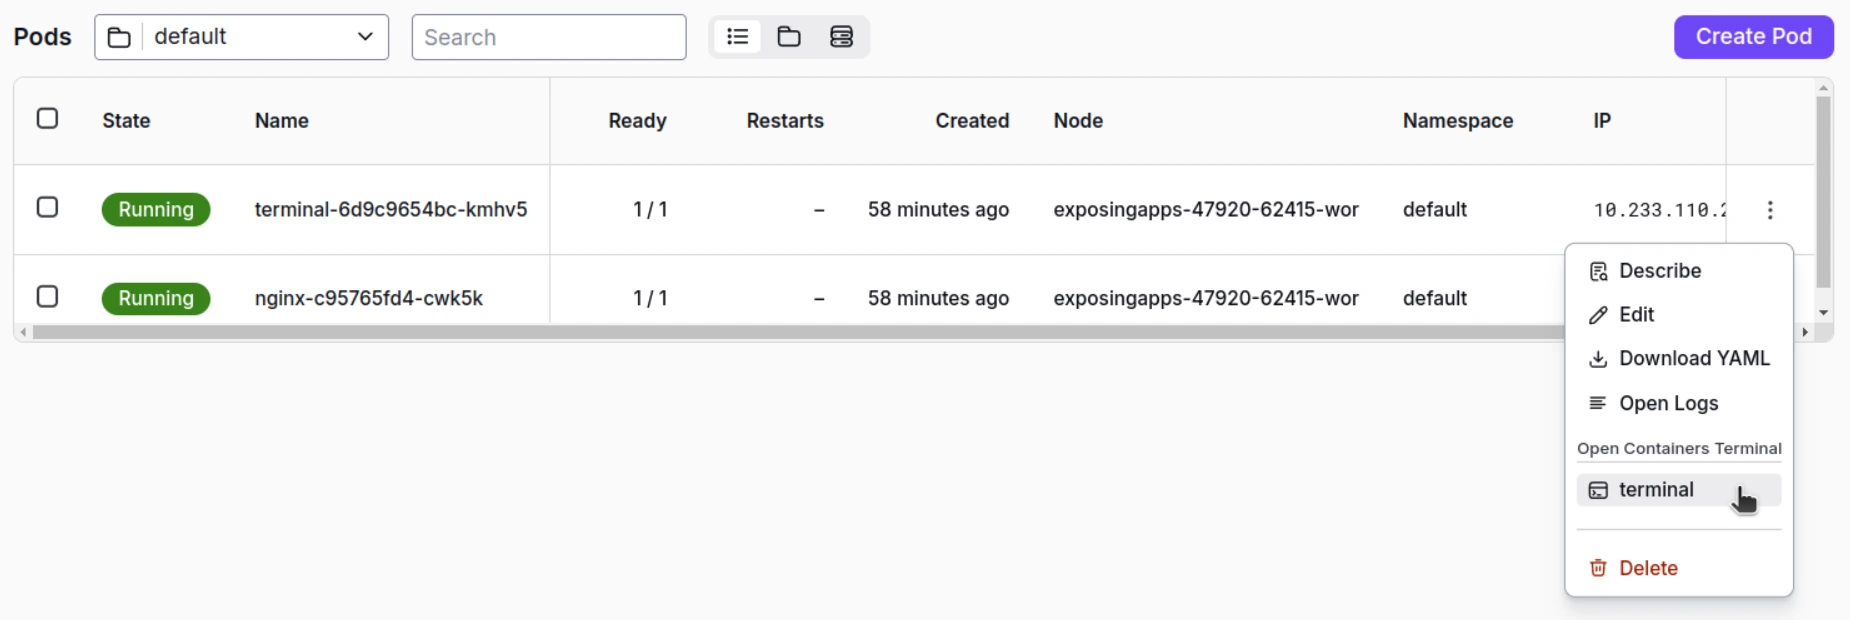
Image A

Image B
3. Use LiveOps to open terminal to the "terminal pod".
- Now you are inside the pod, inside the cluster - see action in Image A)
- Kubernetes automatically created DNS records inside pods to make networking between apps easier. Inside of a namespace, pods can contact each other just by using the name of the service.
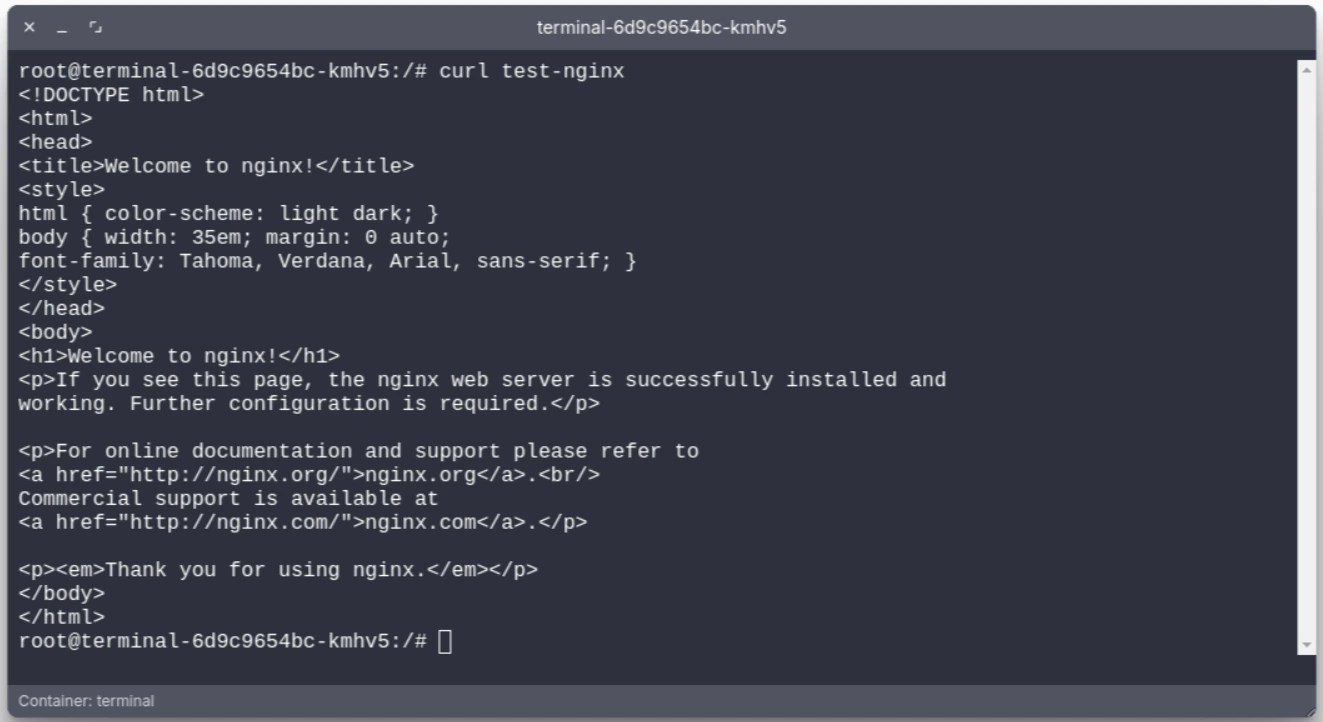
4. You can test it by contacting the nginx service from inside of the terminal pod.
- Simply call the name of the service exposing it, using:
- You will see the nginx pod gets the request and responds to us - Image C). Networking is also possible between namespaces on a cluster-wide level. More here: DNS pod service
Respond in terminal
Bootstrap.yaml
Terminal deployment
apiVersion: apps/v1
kind: Deployment
metadata:
  name: terminal
spec:
  replicas: 1
  selector:
    matchLabels:
      app: terminal
  template:
    metadata:
      labels:
        app: terminal
    spec:
      containers:
        - name: terminal
          image: ubuntu:latest
          command: ["/bin/sh", "-c", "apt update && apt install -y curl && sleep infinity"]
Nginx deployment
apiVersion: apps/v1
kind: Deployment
metadata:
  name: nginx
spec:
  replicas: 1
  selector:
    matchLabels:
      app: nginx
  template:
    metadata:
      labels:
        app: nginx  #All pods created by this deployment will have label
    spec:
      containers:
        - name: nginx
          image: nginx:latest