04 - Taikun Ingress - Managed Apps
This guide outlines the process of exposing applications deployed using preconfigured Helm charts—commonly referred to in Cloudera Cloud Factory as Catalog Applications. These are applications available for installation into user clusters via the Cloud Factory platform.
Cloudera Cloud Factory provides a curated set of Helm charts known as Taikun Managed Apps, which are maintained and preconfigured for ease of use. This documentation uses Taikun Managed Apps as the reference implementation, but the same principles generally apply to many Helm charts.
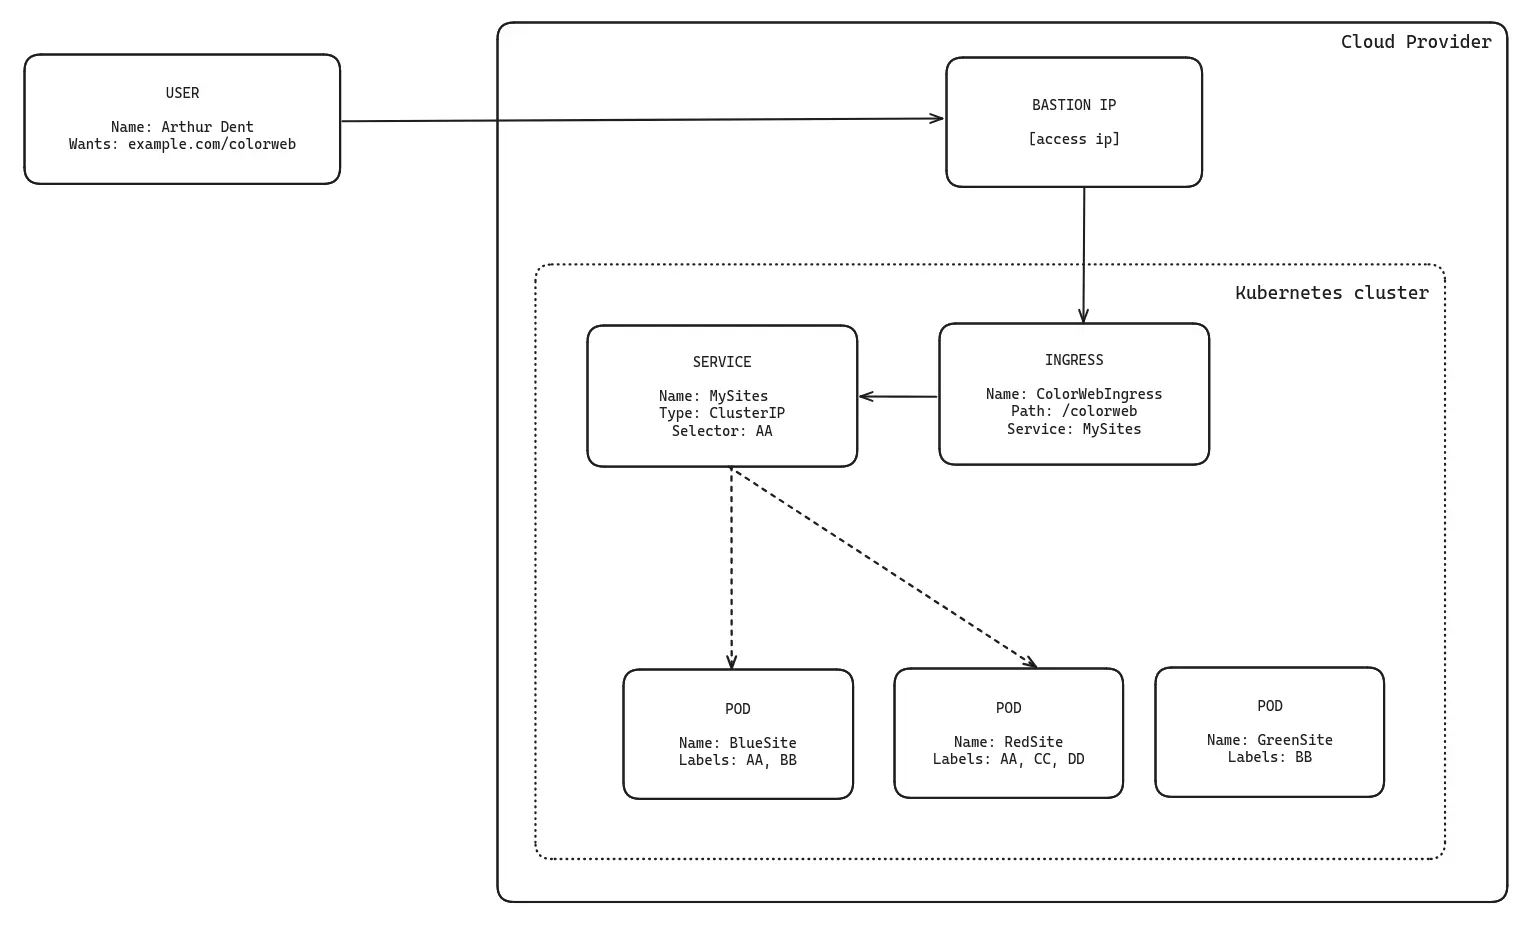
We will expose Taikun managed apps using Taikun Ingress. In theory, its the same thing as we had in the previous chapter. The only difference is that instead of creating the Ingress and services manually, we will use Helm chart variables which create the resources instead of us.
How it works
Overview of Helm Charts
Helm charts are versioned packages that define and bundle multiple Kubernetes resources together as a single application, enabling consistent deployment and management across environments. This abstraction simplifies the deployment and management of complex applications on Kubernetes.
For example, the Helm chart for WordPress typically deploys two pods: - One for the WordPress application itself - One for the MySQL database backend
Helm charts use a powerful templating engine that allows users to customize deployed resources via configuration values. One such configurable parameter is:
Setting ingress.enabled=true triggers the deployment of an Ingress resource, alongside the application's core components (e.g., pods, services).
This built-in logic enables users to expose applications externally without manually defining Kubernetes resources like Ingress objects or LoadBalancers.
Defining Application Configuration Using questions.yaml
question.yaml file
questions:
- variable: replicaCount
  default: 1
  type: int
  description: "Number of replicas."
- variable: service.type
  type: enum
  description: "Service type. LoadBalancer to expose outside of Kubernetes."
  options:
  - LoadBalancer
  - NodePort
  - ClusterIP
- variable: service.annotations."service.beta.kubernetes.io/aws-load-balancer-scheme"
  type: enum
  description: "Internal or external LoadBalancer for AWS and Zadara"
  options:
  - internet-facing
  - internal
The questions.yaml file acts as a bridge between Helm chart configuration and user-friendly interfaces. It defines what users can modify, enforces valid input formats, and provides contextual descriptions that make Kubernetes deployments easier and more reliable.
Explanation:
variable: Refers to the Helm value key (replicaCount) that controls the number of pod replicas created for the deployment.default: Sets the default number of replicas to1. If the user does not modify this value, one pod instance will be created.type: Defines the expected data type of the variable. In this case,intmeans the input must be an integer.description: A human-readable explanation displayed in the UI. It helps users understand what the setting does — here, it specifies that the value represents the number of running instances (replicas) of the workload.
- variable: service.type
  type: enum
  description: "Service type. LoadBalancer to expose outside of Kubernetes."
  options:
  - LoadBalancer
  - NodePort
  - ClusterIP
Explanation:
variable: Indicates the Helm value path (service.type) that defines the Kubernetes Service type.type: Set asenum, meaning the value must be selected from a predefined list of valid options.description: Explains the purpose — the service type determines how the application will be exposed within or outside the cluster.options: Lists the allowed service types:LoadBalancer— Exposes the service externally using a cloud provider’s load balancer (used for public access).NodePort— Opens a specific port on all cluster nodes, allowing external access through<NodeIP>:<NodePort>.ClusterIP— The default type, exposes the service only within the cluster (internal communication).
- variable: service.annotations."service.beta.kubernetes.io/aws-load-balancer-scheme"
  type: enum
  description: "Internal or external LoadBalancer for AWS and Zadara."
  options:
  - internet-facing
  - internal
Explanation:
variable: Refers to a specific annotation key under the service.annotations section. This particular annotation configures how the AWS (or Zadara) load balancer behaves when a LoadBalancer service type is used.type: Again, enum, meaning users must select from a fixed set of valid options.description: Describes the purpose — determines whether the AWS load balancer should be publicly accessible or internal to the VPC.options:internet-facing— Creates a publicly accessible load balancer that exposes the service to the internet.internal— Creates a private load balancer accessible only within the same VPC (for internal traffic).
Lab excercises:
1. Create a Catalog Application with WordPress
- Start by creating a new application from the catalog.
- Select WordPress as the application you want to deploy.
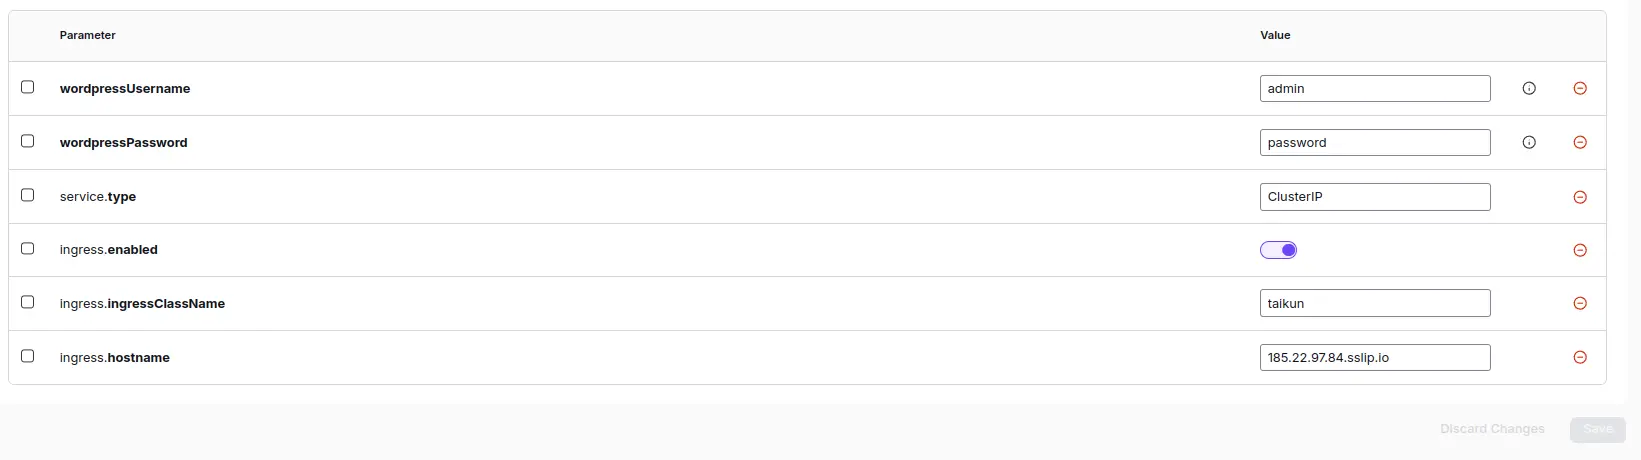
2. Set Parameters for Ingress in the Catalog Settings
- Go to the catalog parameters section. Here, configure the Ingress settings such as the hostname or domain you want to use. Make sure to define these values properly so the service can be accessed externally.
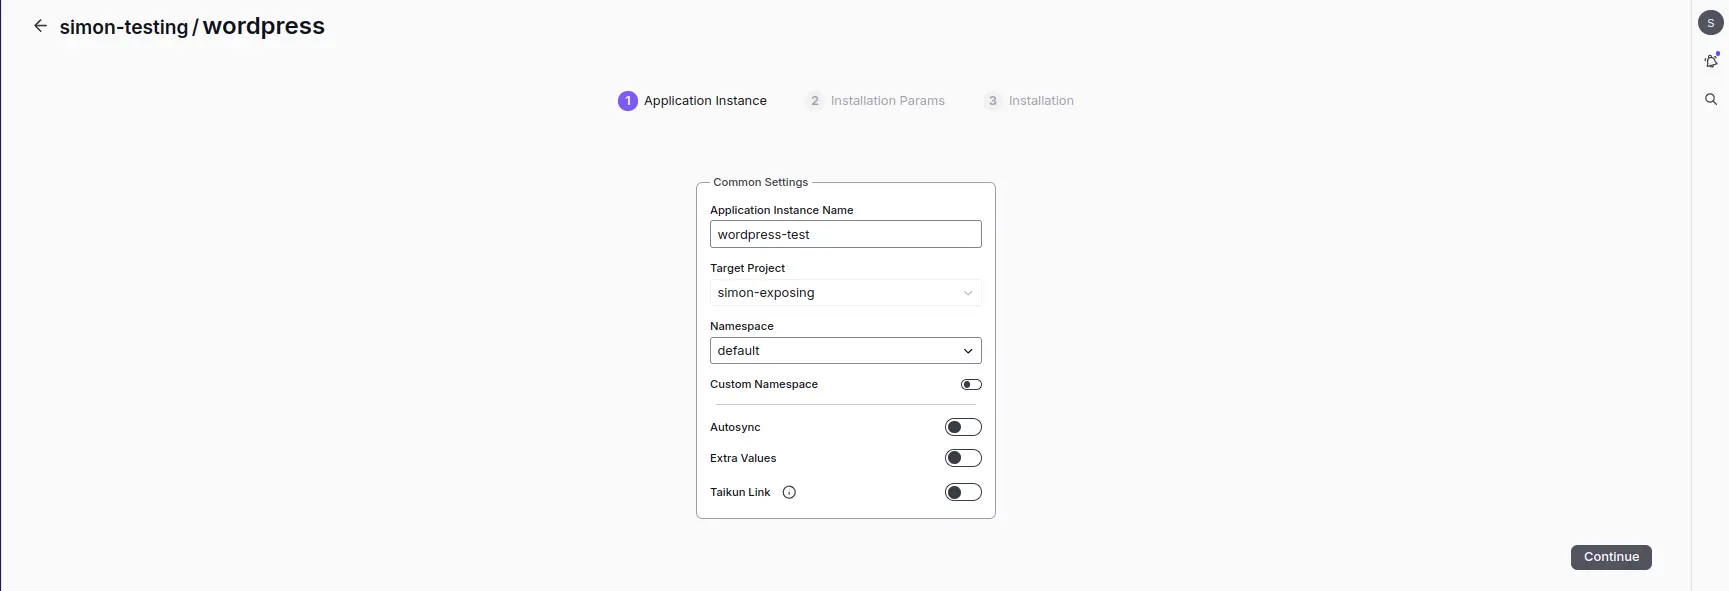
Common Settings
Set parameters
Note
You must set the ingressClass parameter to taikun
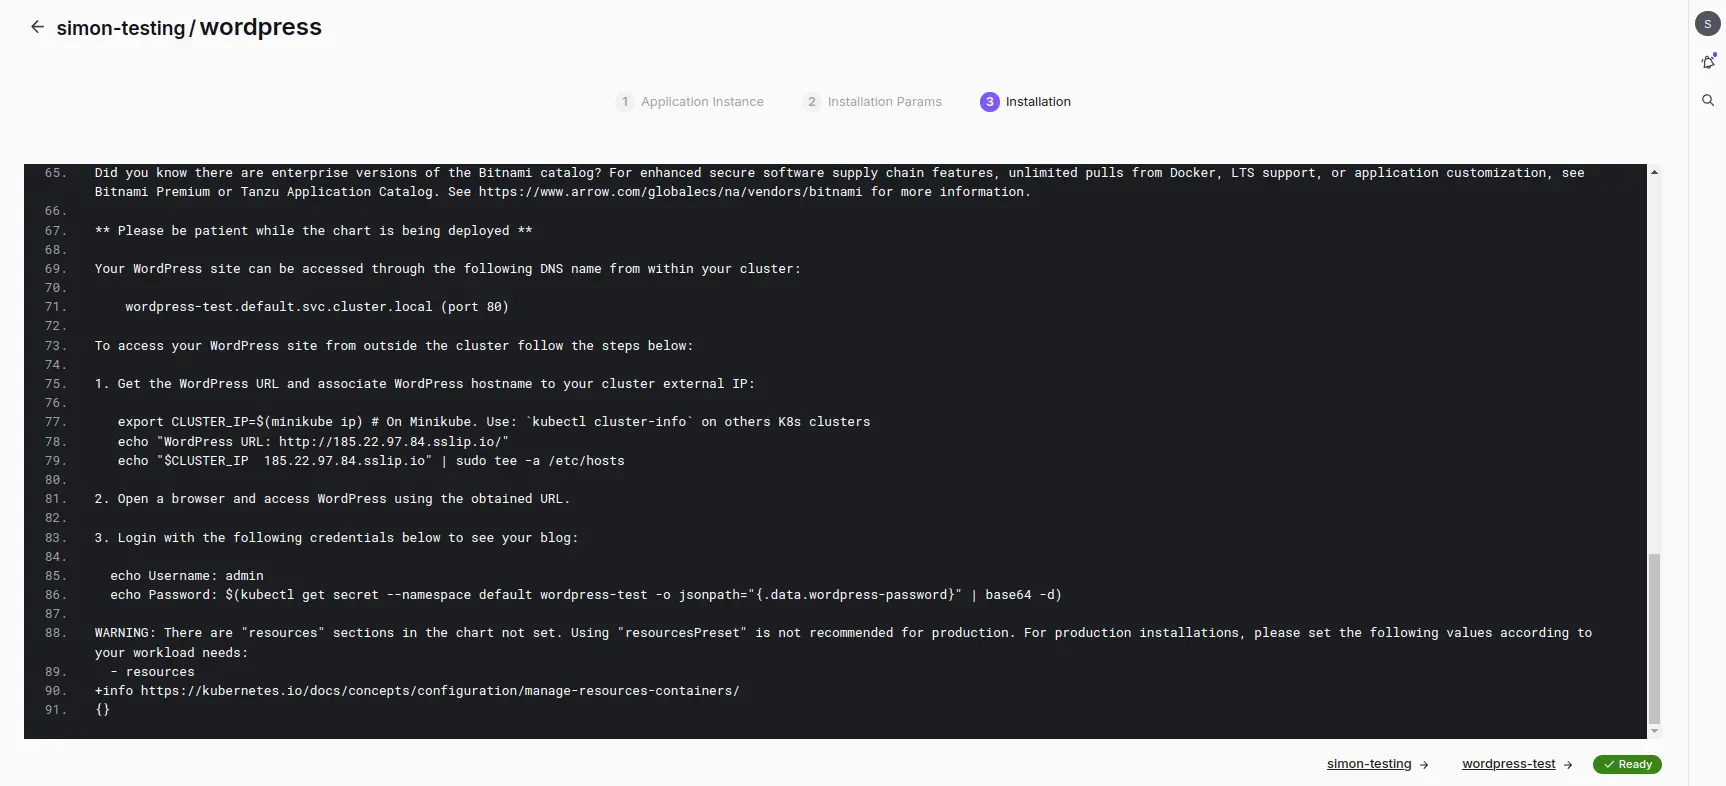
Success Install
3. (optional) Configure DNS or Use sslip.io for Testing
- Point your DNS to the appropriate external IP address of your cluster. If you don’t have a custom domain available, you can use a temporary domain from sslip.io, which maps your IP automatically (e.g., 192-0-2-1.sslip.io).
4. Deploy and Access WordPress
- Deploy the application once all parameters are set. After deployment is complete, use the appropriate WordPress access command or URL to verify that the application is running correctly and accessible from the internet.
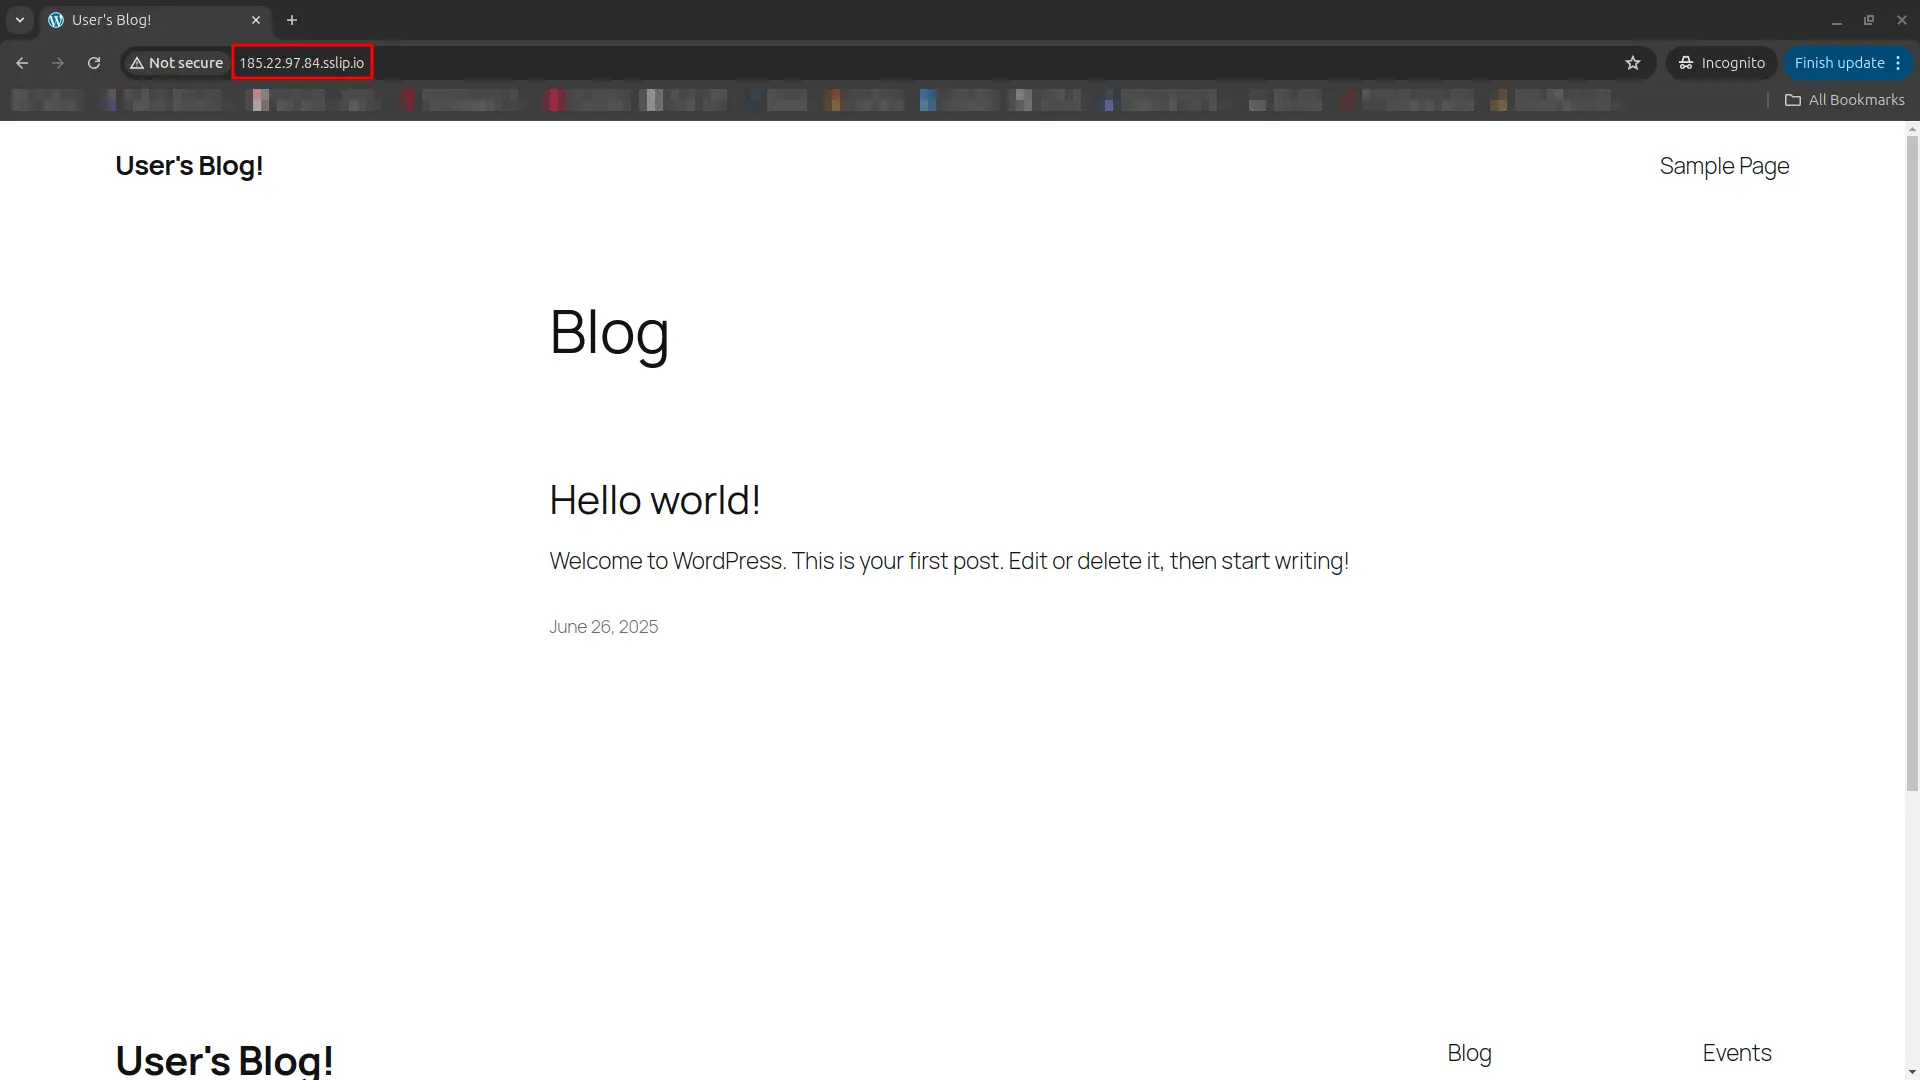
Wordpress
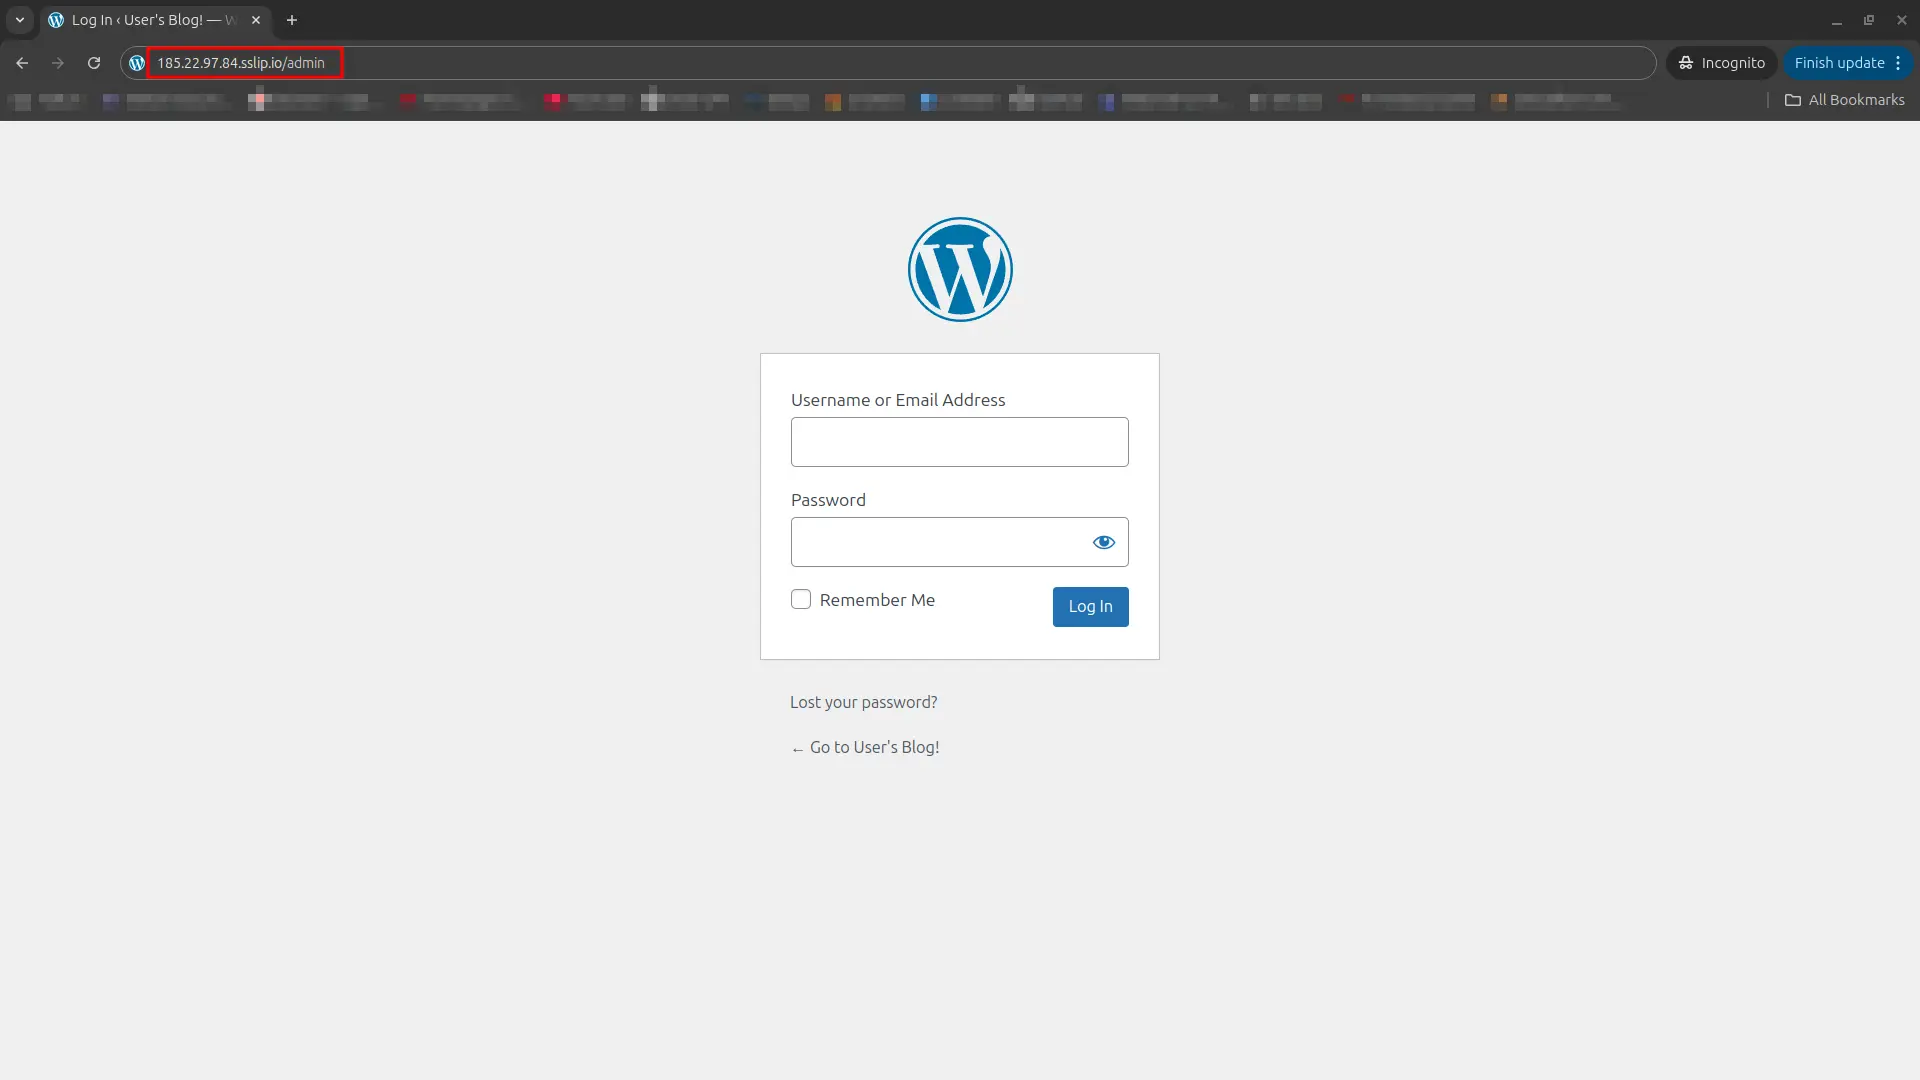
Wordpress admin