VMs Management
User | Manager | Partner
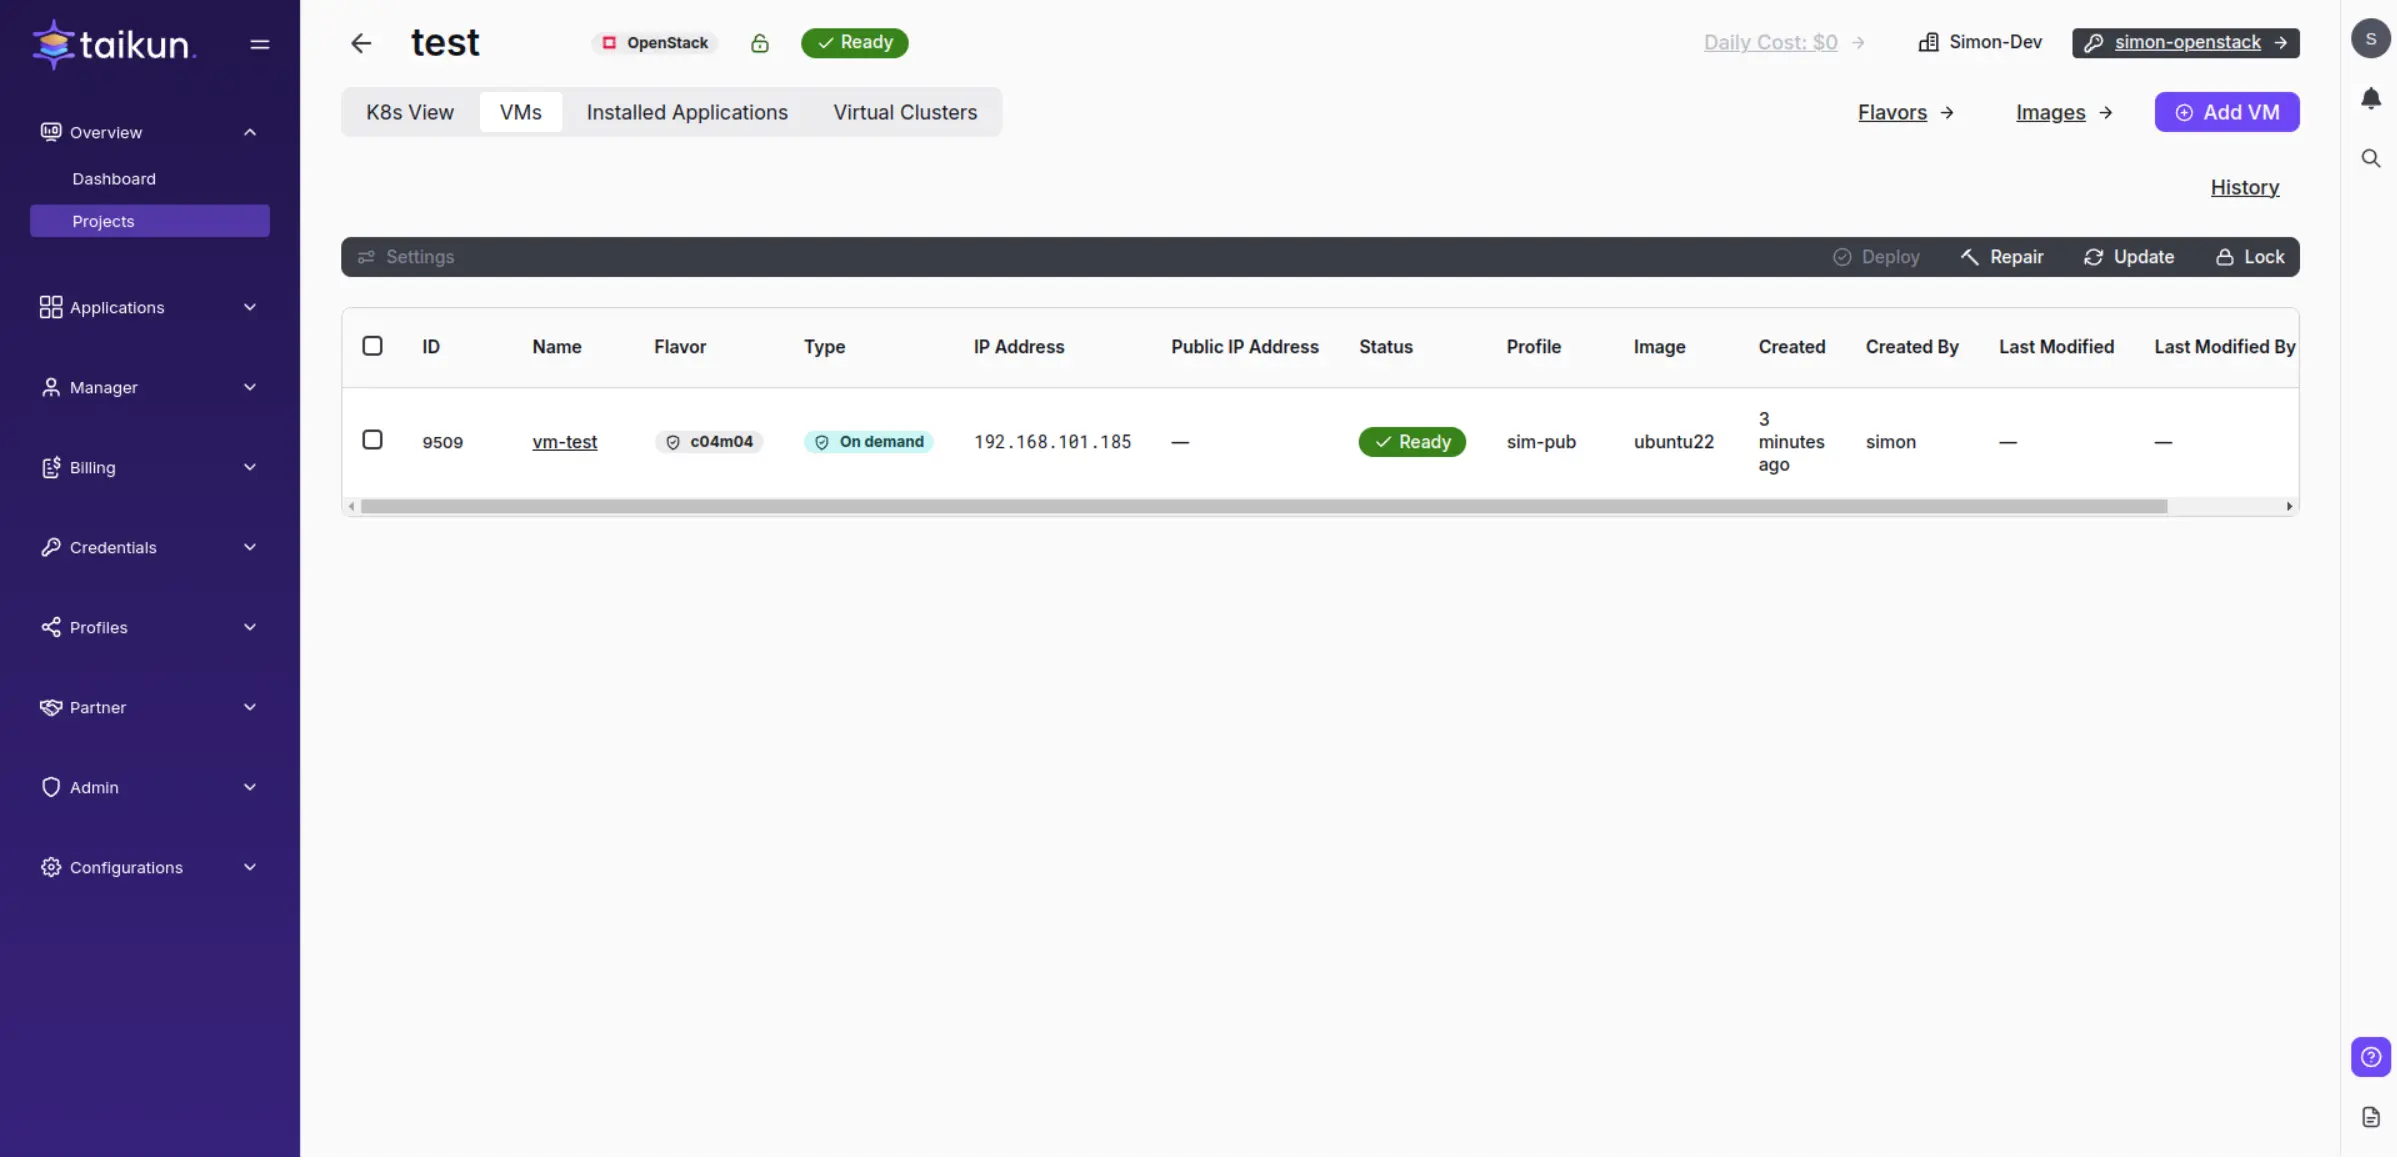
By clicking the VMs button on the Servers page or VMs View in Project page, you are redirected to the VM Servers. Here you can see all the virtual machines for your Project with their description.
VMs
Project Info
Under Servers, the title is a brief description of the project – such as Project Name (with locked/unlocked image), Project Status, Cloud Type, or Cloud Credentials.

Project info
When there is some operation going on, you can also see here ETC = Estimated Time to Complete. It is the approximate time (in minutes) until the cluster will be completed.

ETC
Servers
Every server is described by ID, Name, Flavor, IP Address, Public IP Address, Status, Profile, Image, you can see the last modification made (Created, Created By, Last Modified, Last Modified By), and Actions.
Actions
Server status can be:
- Deleting
- Failure
- Pending
- Pending Delete
- Pending Upgrade
- Ready
- Updating
- Upgrading
Actions
Commit
Sends the changes to the repository. Once the cluster is committed, you will see ETC in the project info.
Repair
When the servers are Failing, use the repair button.
Add VM
To create a new server, click the "Add VM" button and fill in all the fields. You, as a user, can’t delete servers – think twice about which and how many servers you want to create.
Note
To create a Virtual Machine, Manager of your Taikun account needs to bind a Flavor and an Image to your Project along with creating a Standalone Profile.

Add VM
Note
Letters must be lowercase!
Configuration Options
- Server Name: Only alphanumeric characters and dashes are allowed, 1-30 characters.
- Flavor: Choose from the list of offered flavors (e.g., n0.large).
- Image: Choose from the list of provided images (e.g., ubuntu-20.04).
- Volume Size: Minimal size is automatically filled in when you select an image, and you can only increase the volume size.
- Volume Type: (optional) Choose from the drop-down selection.
- Profile: Choose a Standalone profile.
- Count: How many VMs you want to create.
- Public IP: Check if you’re going to enable public IP.
- Cloud-init: (optional) If set, it will override the SSH key from the standalone profile.
- Tags: Enter Key and Value.
- Disk: Enter Name, choose Size, and select Volume Type.
Warning
If the project is locked, you can’t use Commit, Repair, or Add VM.
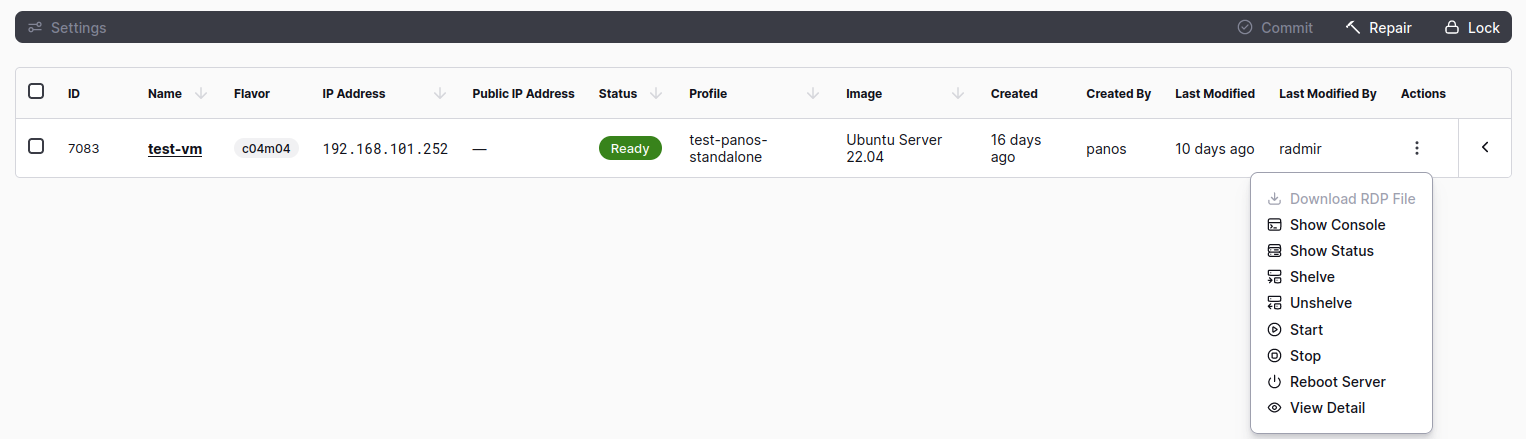
VM Action Buttons
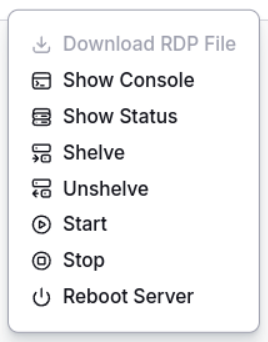
Action Button
Download RDP File
RDP file (Remote Desktop Protocol file) is a configuration file used to initiate a remote desktop connection to a virtual machine (VM) or a remote computer. It contains the remote computer’s address, authentication credentials, display settings, and other connection parameters. By opening an RDP file, users can access and control a remote VM or computer as if they were physically present at its location.
Info
To enable RDP file option:
Port 3389 should be added in the Standalone profile since port 3389 is the default port used for Remote Desktop Protocol (RDP) connections.
Project should be unlocked.
Show Console
Show Console allows administrators or users to access a VM’s desktop environment without needing a remote desktop connection or access through a network.
Show Status
The Show Status feature provides a valuable means of determining the operational state of a virtual machine (VM) by indicating whether it is currently active or inactive. This functionality serves as an informative tool for users and administrators to ascertain the real-time status of a VM within a virtualized environment.
Shelve
Shelving an instance refers to temporarily setting aside an instance within a Cloud computing environment while preserving its associated resources, which may include volumes or disks. By shelving an instance, users can suspend its operation, freeing up resources and reducing costs while retaining its exact state and configuration for future use.
Unshelve
Unshelve instance is the reverse operation of Shelve.
Start
The Start button within a virtual machine (VM) is a control mechanism that initiates powering on and starting a previously stopped or powered-off VM. Its primary function is to transition the VM from a halted or inactive state to an operational state, allowing it to resume normal functioning and perform its intended tasks.
Stop
The Stop button within a virtual machine (VM) is a control mechanism that facilitates the termination of all active processes and operations running within the VM. Its primary purpose is to halt the execution of tasks and bring the VM to a stopped state, preventing any further activity or access to its resources.
Reboot Servers
Soft Reboot
A soft reboot of a server within a virtual machine (VM) involves initiating a restart of the server’s operating system while allowing the system’s processes and tasks to complete their current operations before the restart takes place. This method ensures that ongoing operations are gracefully terminated, and resources are properly released before the server restarts.
Hard Reboot
Hard reboot refers to a process in which a server within a virtual machine environment undergoes a complete and immediate shutdown of all running processes, resulting in the termination of all active data and system operations. Following this abrupt termination, the server is restarted, initiating a fresh boot-up sequence.