Microsoft Azure
Microsoft Azure, commonly referred to as Azure, is a comprehensive cloud computing platform provided by Microsoft. It offers a wide range of services and tools for building, deploying, and managing applications and services through Microsoft’s global network of data centers.
Here you can learn more about Microsoft Azure.
Requirements for Microsoft Azure
Requirements for Microsoft Azure
To successfully establish a connection between your Taikun CloudWorks and Microsoft Azrue accounts:
Use this command in Azure CLI
az ad app credential reset --id <APP_ID> --append --display-name "<SECRET_NAME>" --years 1
To get this CLI output:
{
 "appId": "393c6991-yyyy-xxxx-****-84e517348ef6",
 "password": "xxxxx~****CIRrnOaHJr5t2bbpBHJ7MT3IMO3Ya-h",
 "tenant": "8e15c4c4-****-xxxx-yyyy-9b4004bf3f4b"
}
Where appId is Azure Client ID, password is Azure CLiend Secret and tenant is Azure Tenant ID
1) If you haven’t installed Azure CLI, you can do it with the following command:
The easiest way to install Azure CLI is using the official script that runs all commands in one step:
To review the script before running it, download it with curl and open it in your text editor.
For more detailed Step-by-step installation instructions learn HERE
2) Login
You will be redirected to an Azure page where you can choose your account:
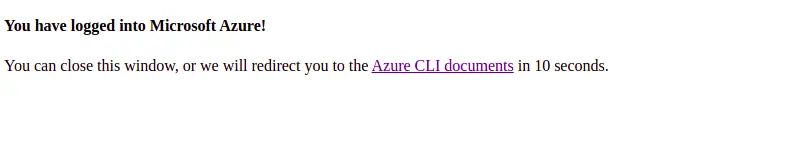
Azure Web Login
CLI output will be similar to this:
[
  {
    "cloudName": "AzureCloud",
    "id": "c0xxxxa5-xxx-4ecb-xxxx-f37bxxxx28d6",
    "isDefault": true,
    "name": "Bezplatná zkušební verze",
    "state": "Enabled",
    "tenantId": "32xxxxb3-xxx-46b3-xxxx-0exxxxc46d1",
    "user": {
      "name": "usermail@gmail.com",
      "type": "user"
    }
  }
]
You’ll need to fetch the Azure Subscription ID (“id”) and Azure Tenant ID (“tenantID”) fields from the output. Here’s what we would use in our test instance:
3) Create a new Azure App with the following command:
CLI output will look like this:{
"acceptMappedClaims": null,
"addIns": [],
"allowGuestsSignIn": null,
"allowPassthroughUsers": null,
! "appId": "7bxxxxc3-xxxx-4d74-xxxx-8c40xxxb558", !
"appLogoUrl": null,
"appPermissions": null,
"appRoles": [],
"applicationTemplateId": null,
"availableToOtherTenants": false,
"deletionTimestamp": null,
"displayName": "kubernetes",
"errorUrl": null,
"groupMembershipClaims": null,
"homepage": "http://example.com",
"identifierUris": [],
}
...
{
"adminConsentDescription": "Allow the application to access kubernetes on behalf >
"adminConsentDisplayName": "Access kubernetes",
"id": "59xxx87-xxxx-47b8-xxxx-1708xxxxefcd",
"isEnabled": true,
"type": "User",
"userConsentDescription": "Allow the application to access kubernetes on your beh>
"userConsentDisplayName": "Access kubernetes",
"value": "user*impersonation"
}
...
}
Get appId parameter APPID
Add URIs with this command:
CLI output will look like this:
{
  "acceptMappedClaims": null,
  "addIns": [],
  "allowGuestsSignIn": null,
  "allowPassthroughUsers": null,
! "appId": "7bxxxxc3-xxxx-4d74-xxxx-8c40xxxb558", !
  "appLogoUrl": null,
  "appPermissions": null,
  "appRoles": [],
  "applicationTemplateId": null,
  "availableToOtherTenants": false,
  "deletionTimestamp": null,
  "displayName": "kubernetes",
  "errorUrl": null,
  "groupMembershipClaims": null,
  "homepage": "http://example.com",
  "identifierUris": ["http://kubernetes"],
  }
  ...
  {
    "adminConsentDescription": "Allow the application to access kubernetes on behalf >
    "adminConsentDisplayName": "Access kubernetes",
    "id": "59xxx87-xxxx-47b8-xxxx-1708xxxxefcd",
    "isEnabled": true,
    "type": "User",
    "userConsentDescription": "Allow the application to access kubernetes on your beh>
    "userConsentDisplayName": "Access kubernetes",
    "value": "user*impersonation"
  }
...
}
4) Create a service principal for the app
Use “appId” from the previous step here:
Wait a while, it can take some time and o the subsequest command will fail if its not okay.
CLI output example:
{
  "accountEnabled": true,
  ...
}
...
"objectId": "85xxxxcb-xxxx-4761-xxxx-63fxxxx515e",
  "objectType": "ServicePrincipal",
  "odata.metadata": "https://graph.windows.net/32xxxxb3-xxxx-46b3-xxxx-0e33xxxx46d1/$metadata#directoryObjects/@Element",
  "odata.type": "Microsoft.DirectoryServices.ServicePrincipal",
}
...
5) Create a role assignment:
This might take a while until the SP is ready.
In this case, you will use the subscription ID from step 2:
az role assignment create --role "Owner" --assignee http://kubernetes --scope /subscriptions/c0xxxxa5-xxx-4ecb-xxxx-f37bxxxx28d6
You’ll find the following CLI output:
{
  "canDelegate": null,
  "id": "/subscriptions/c0xxxxa5-xxx-4ecb-xxxx-f37bxxxx28d6/providers/Microsoft.Authorization/roleAssignments/4fxxxx7f-xxxx-4ccf-xxxx-7287xxxxfa14",
  "name": "4fxxxx7f-xxxx-4ccf-xxxx-7287xxxxfa14",
  "principalId": "85xxxxcb-xxxx-4761-xxxx-63ffxxxx515e",
  "principalType": "ServicePrincipal",
  "roleDefinitionId": "/subscriptions/c0xxxxa5-xxx-4ecb-xxxx-f37bxxxx28d6/providers/Microsoft.Authorization/roleDefinitions/8exxxx57-xxxx-443c-xxxx-2fe8xxxxb635",
  "scope": "/subscriptions/c0xxxxa5-xxx-4ecb-xxxx-f37bxxxx28d6",
  "type": "Microsoft.Authorization/roleAssignments"
}
Please be careful when inserting the credentials. You cannot add flavor and create a cluster if you add incorrect credentials.
6) Create a Secret
To create a new Secret in CLI use this command:
APP_ID- Application ID--append- Add new secret without overwriting existing ones--display-name- Name for new Secret--years- Period of validity
CLI output will look like this:
{
  "appId": "393c6991-yyyy-xxxx-****-84e517348ef6",
  "password": "xxxxx~****CIRrnOaHJr5t2bbpBHJ7MT3IMO3Ya-h",
  "tenant": "8e15c4c4-****-xxxx-yyyy-9b4004bf3f4b"
}
You can switch to Taikun CloudWorks and add your Azure credentials now:
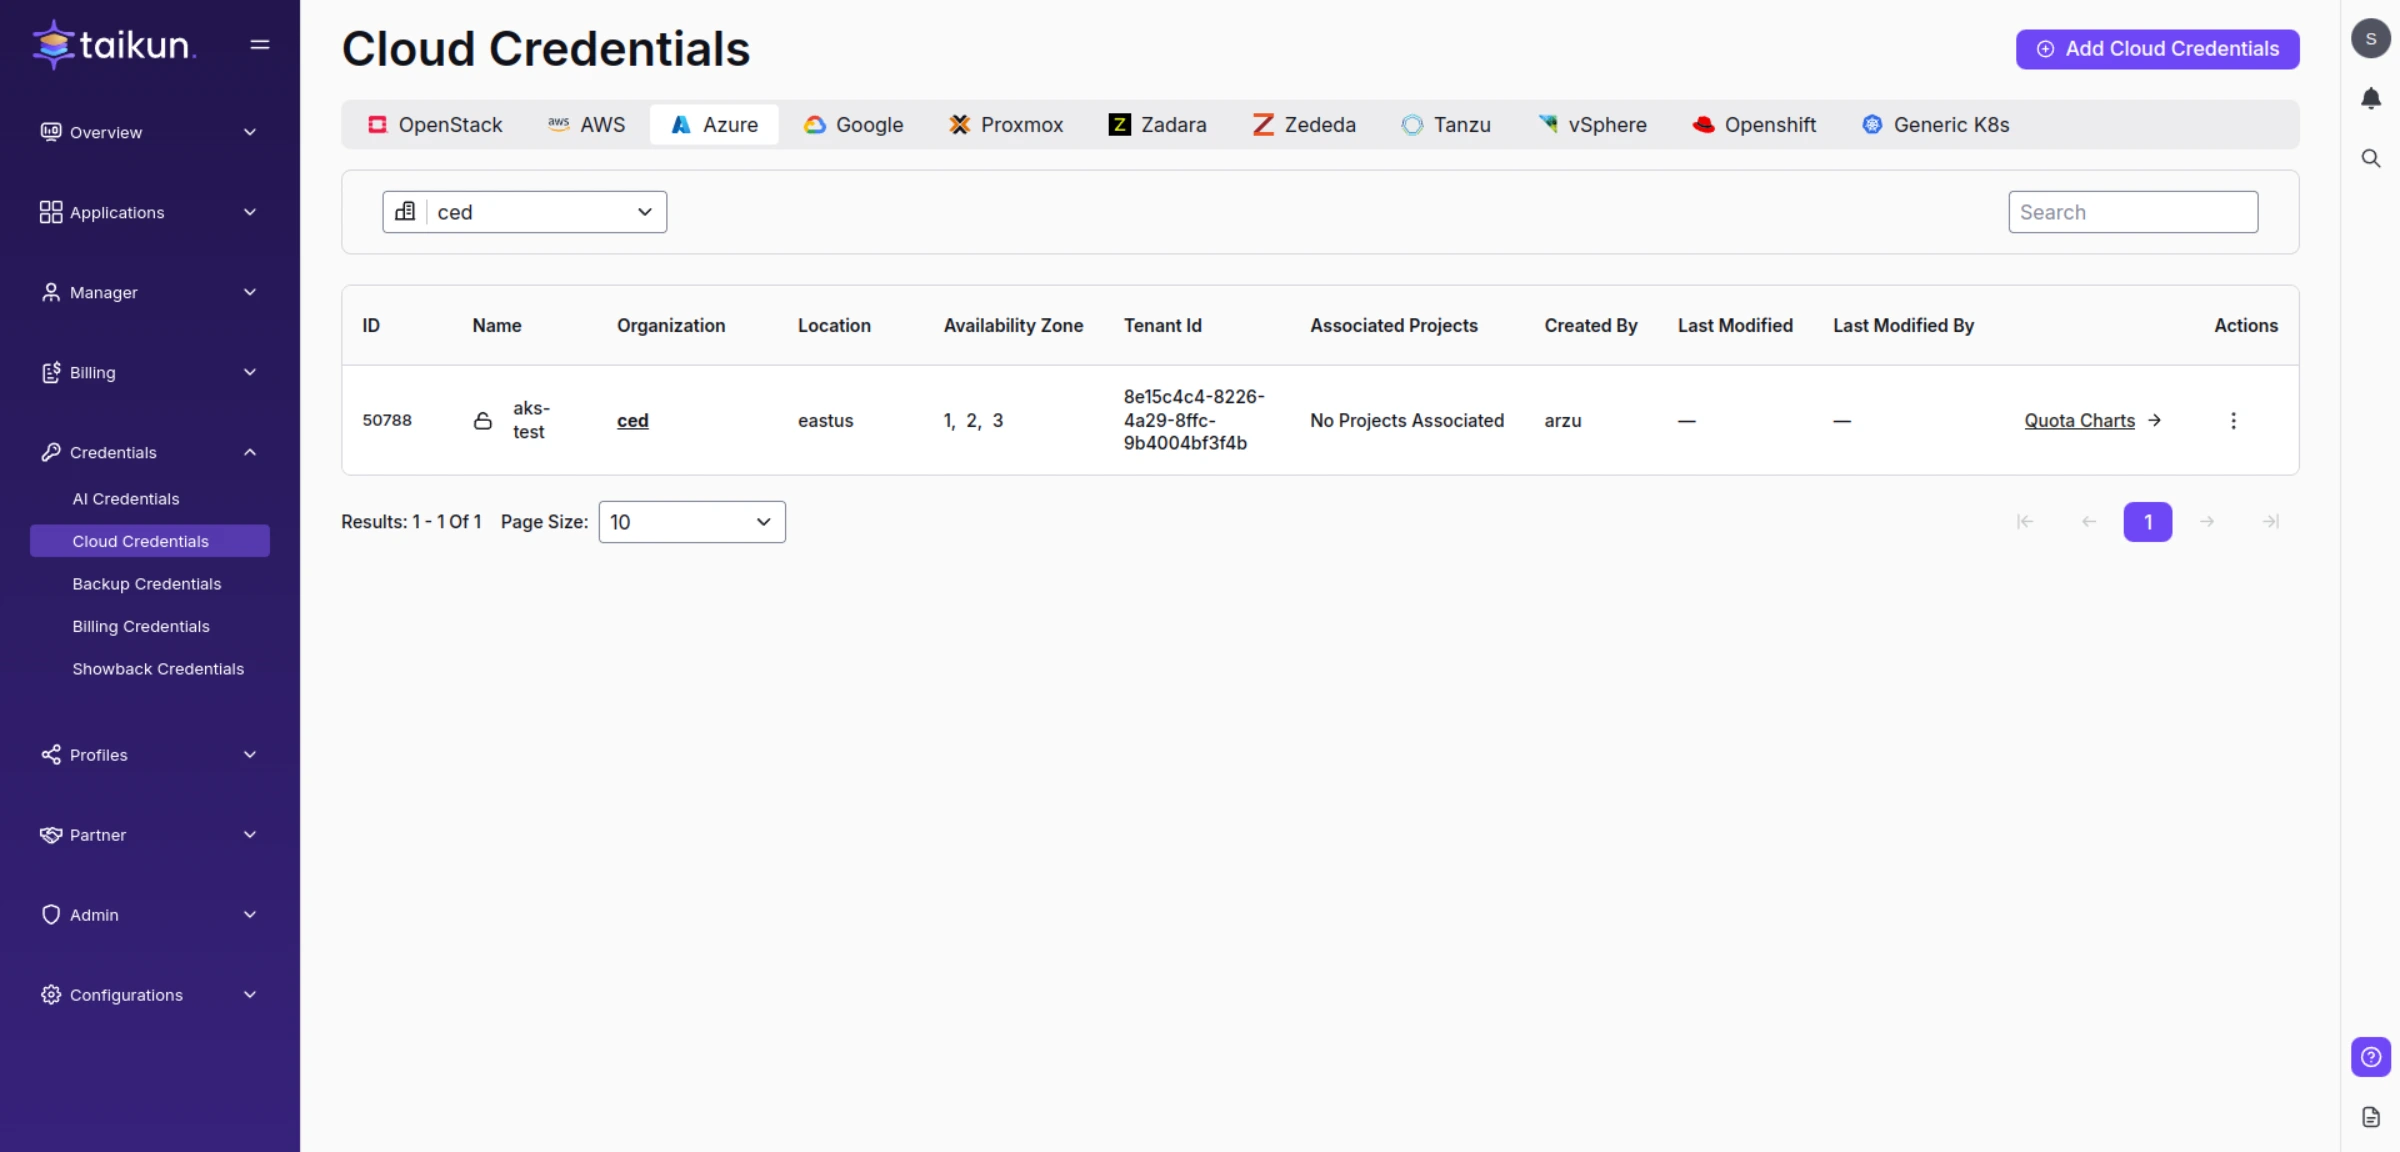
Azure Cloud Credentials
Follow these steps to add Azure Cloud Credentials:
1. Switch to Cloud credentials in Taikun CloudWorks
2. Hit Add Cloud Credentials in the top-right corner
3. Specify the necessary parameters in the Azure section:
- Cloud Name – choose a name for your Cloud Credentials (3-30 characters, e.g. cloud-test)
- Azure Client ID -
Azure appId - Azure Client Secret -
Azure password ID - Azure Tenant ID -
Azure Tenant ID
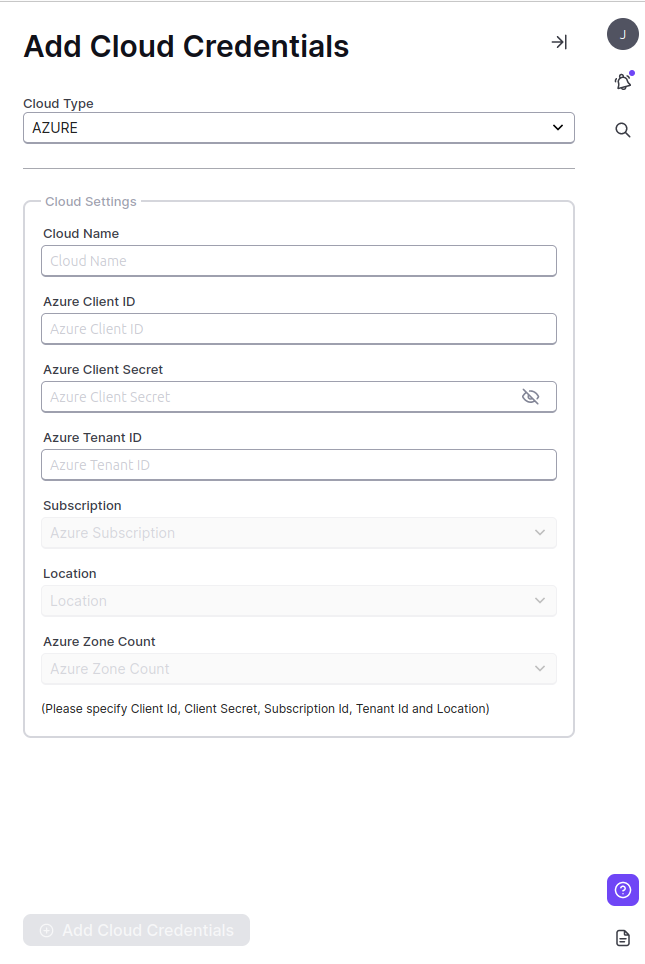
Add Azure Cloud Credentials
Where to find the Azure credentials
If you haven’t created your application via CLI, you can find the guidelines here.
Credentials for Azure are located in different tabs. Instructions on where to find them are posted below.
Please be careful when inserting the credentials. You cannot add flavor and create a cluster if you add incorrect credentials.
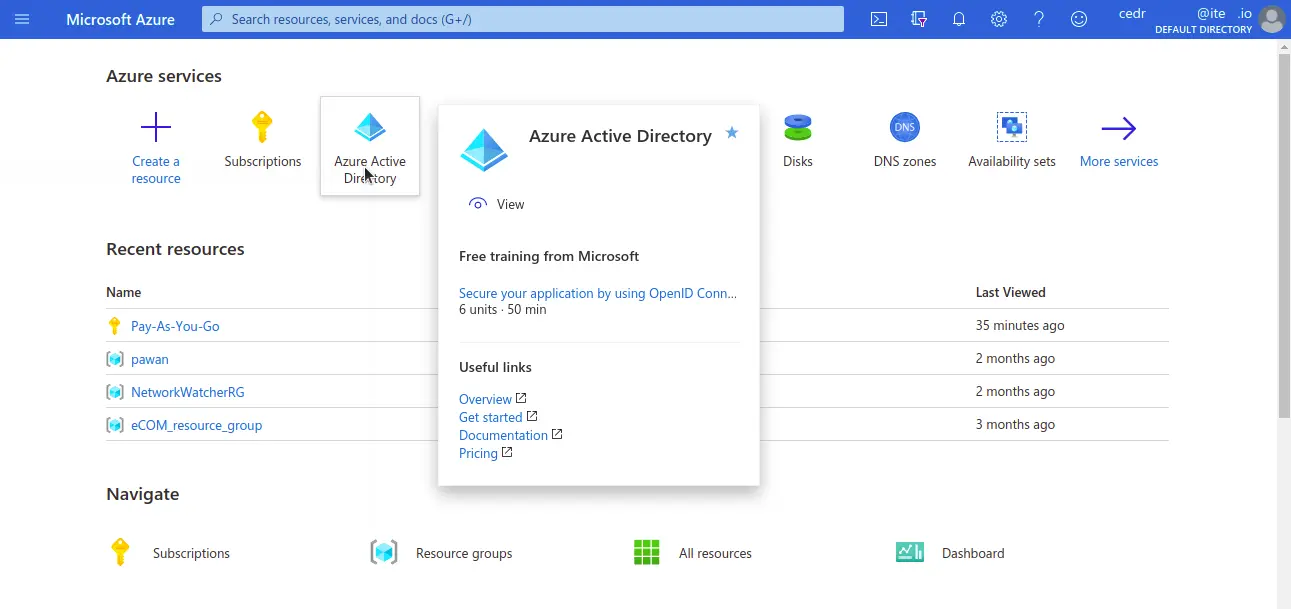
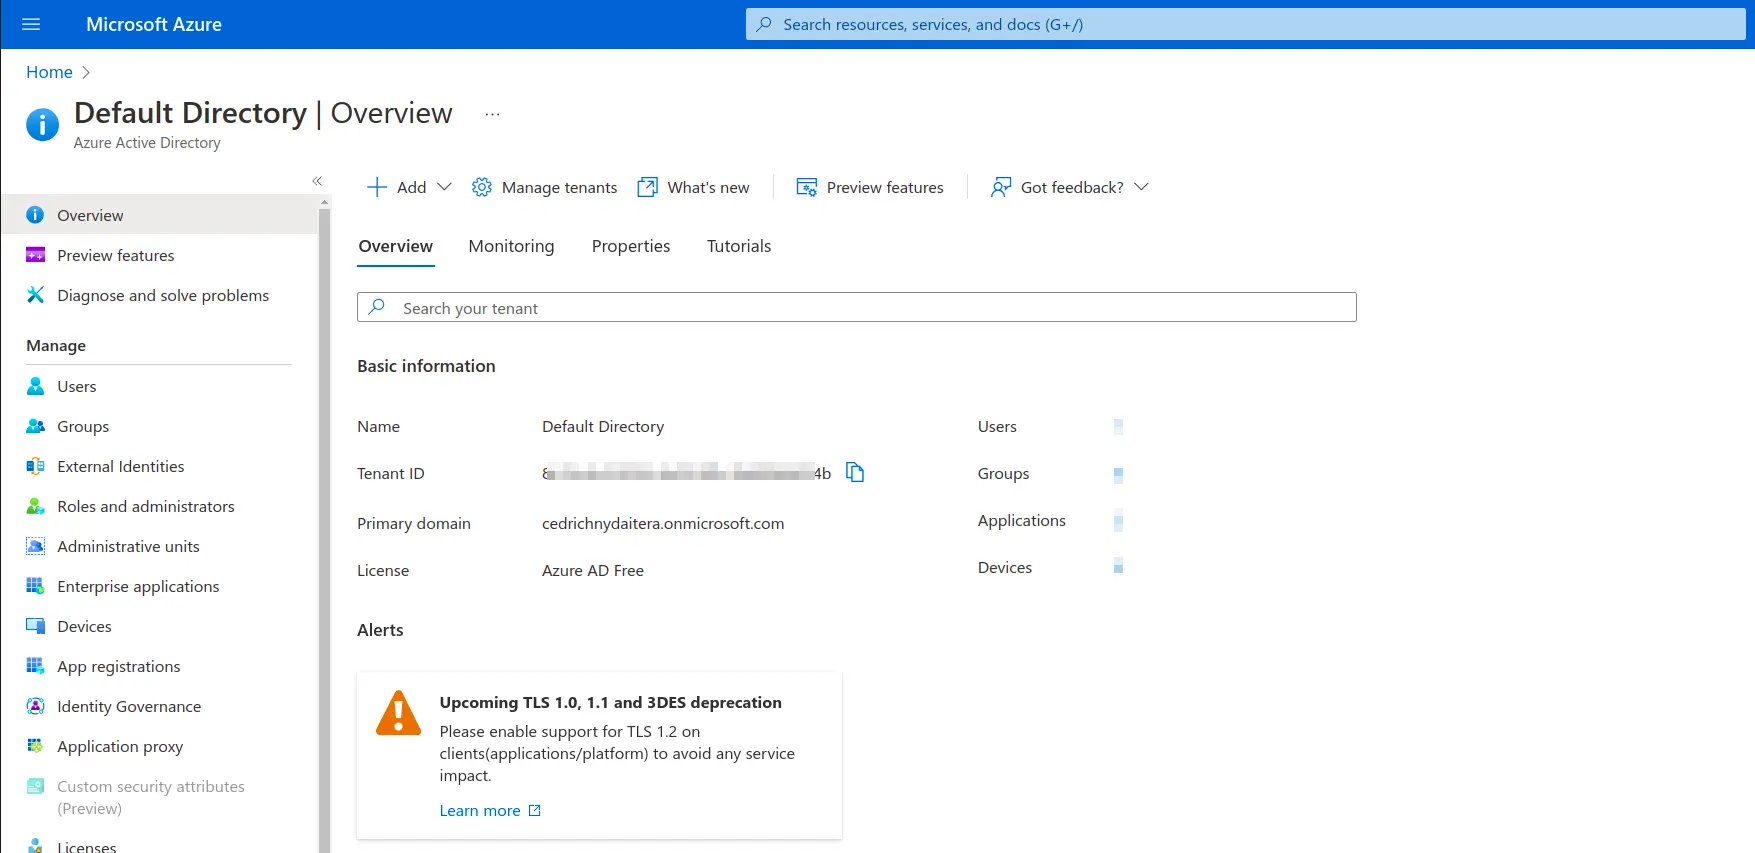
Azure Client and Tenant ID
- Azure Active Directory – App registrations – All Applications – application -> Application (client) ID (=Azure Client Id) and Directory (tenant) ID (Azure Tenant Id)
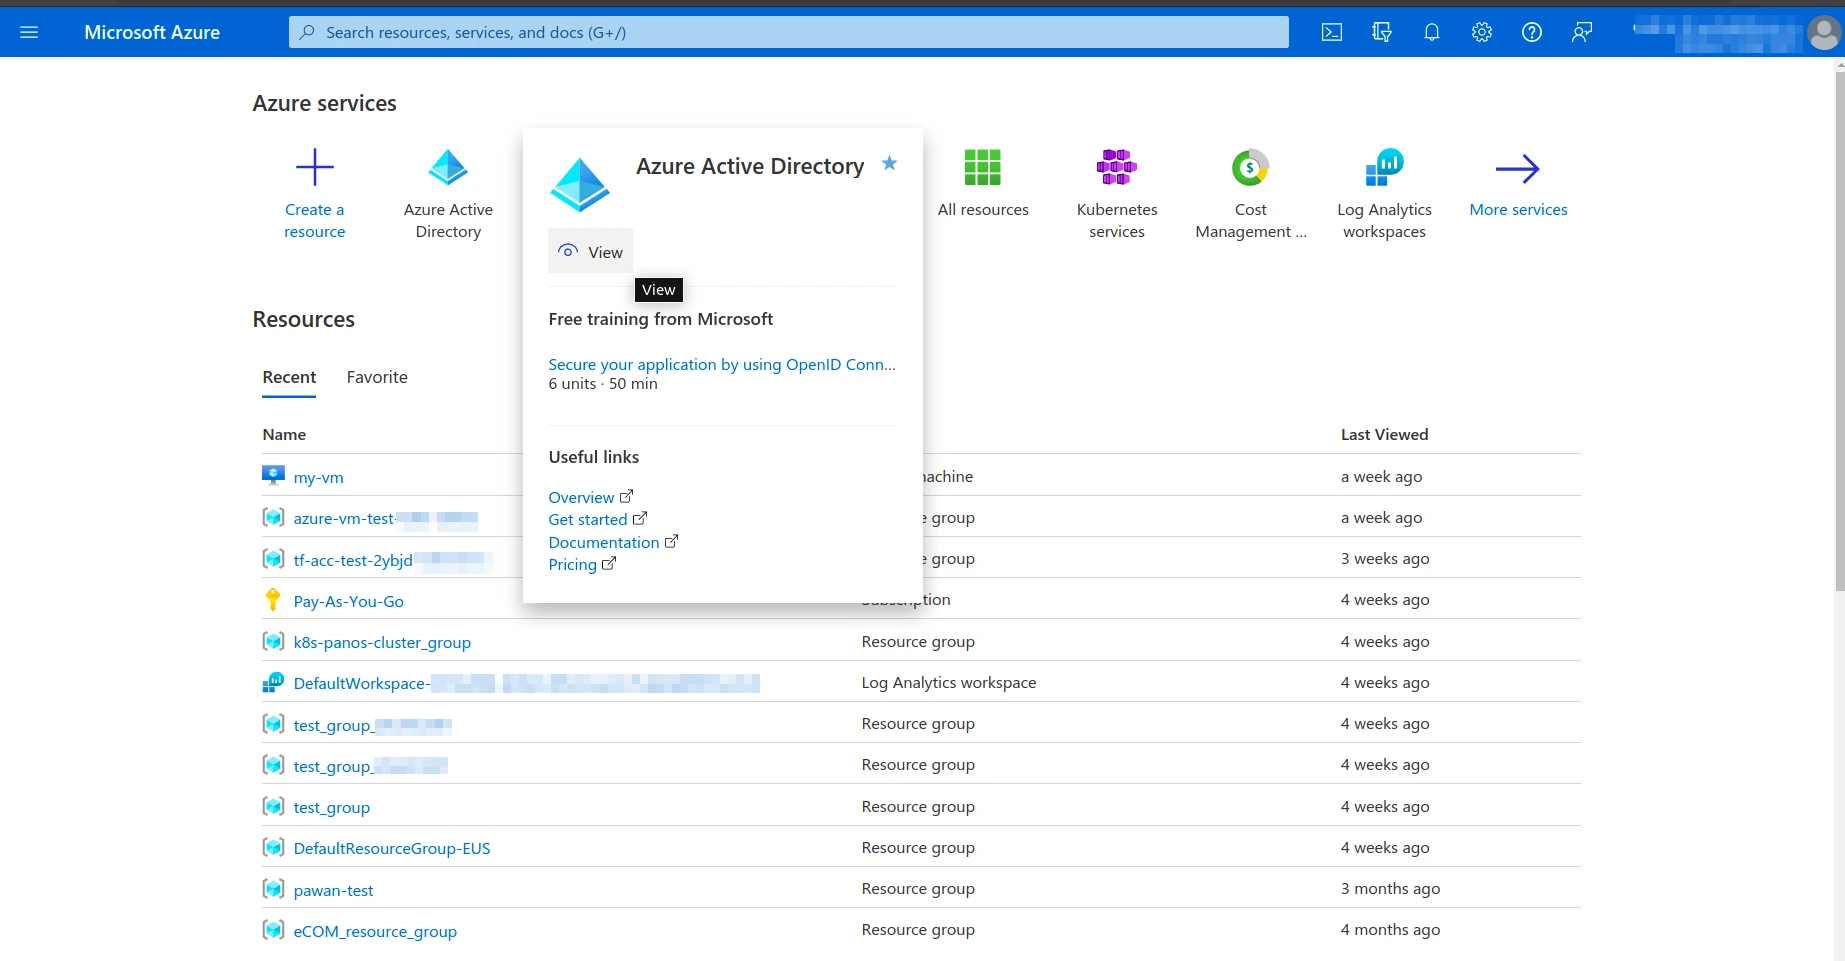
Azure Active Directory

Azure Client Secrets
- Azure Active Directory – App registrations – All Applications – application – Certificates & secrets – Client secrets -> Value (=Azure Secret Id)
Azure Secret ID
Azure Client Secret

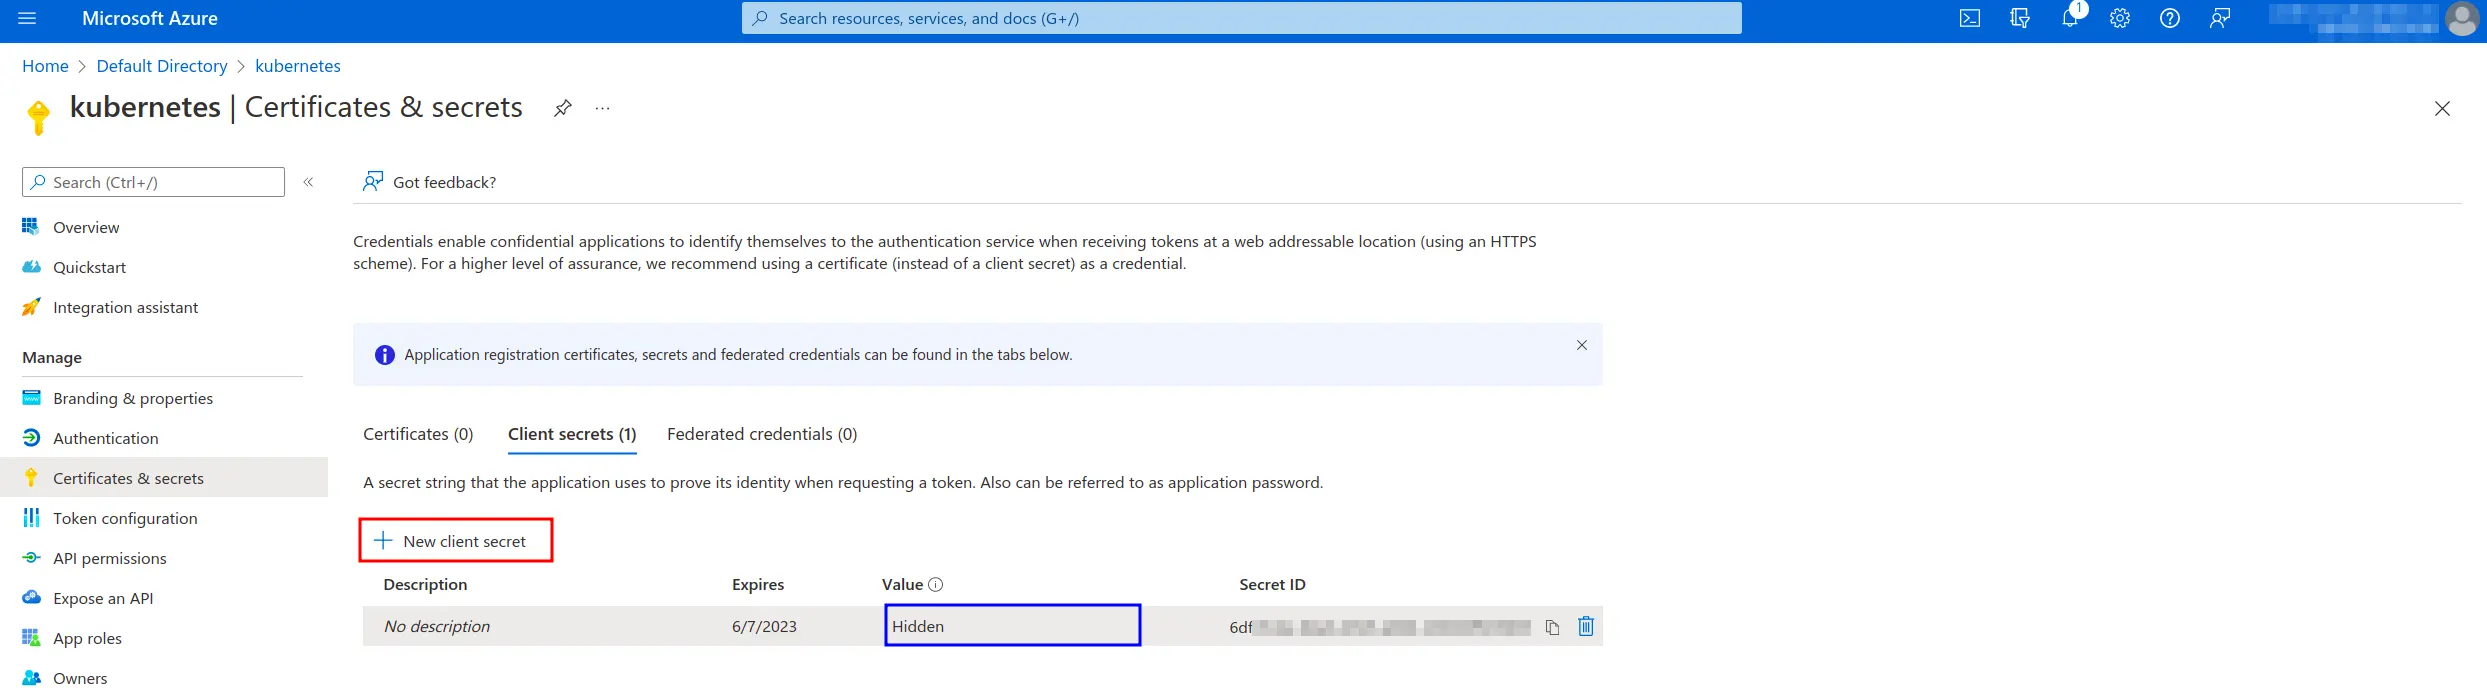
Warning
Client Secret is shown only for the first time, we recommend saving it somewhere else.
Azure Subscription Id
Note
Subscription is chosen from the drop-down selection, but you can find below where to find your Subscription ID.
- Subscriptions -> Subscription ID (=Azure Subscription Id)
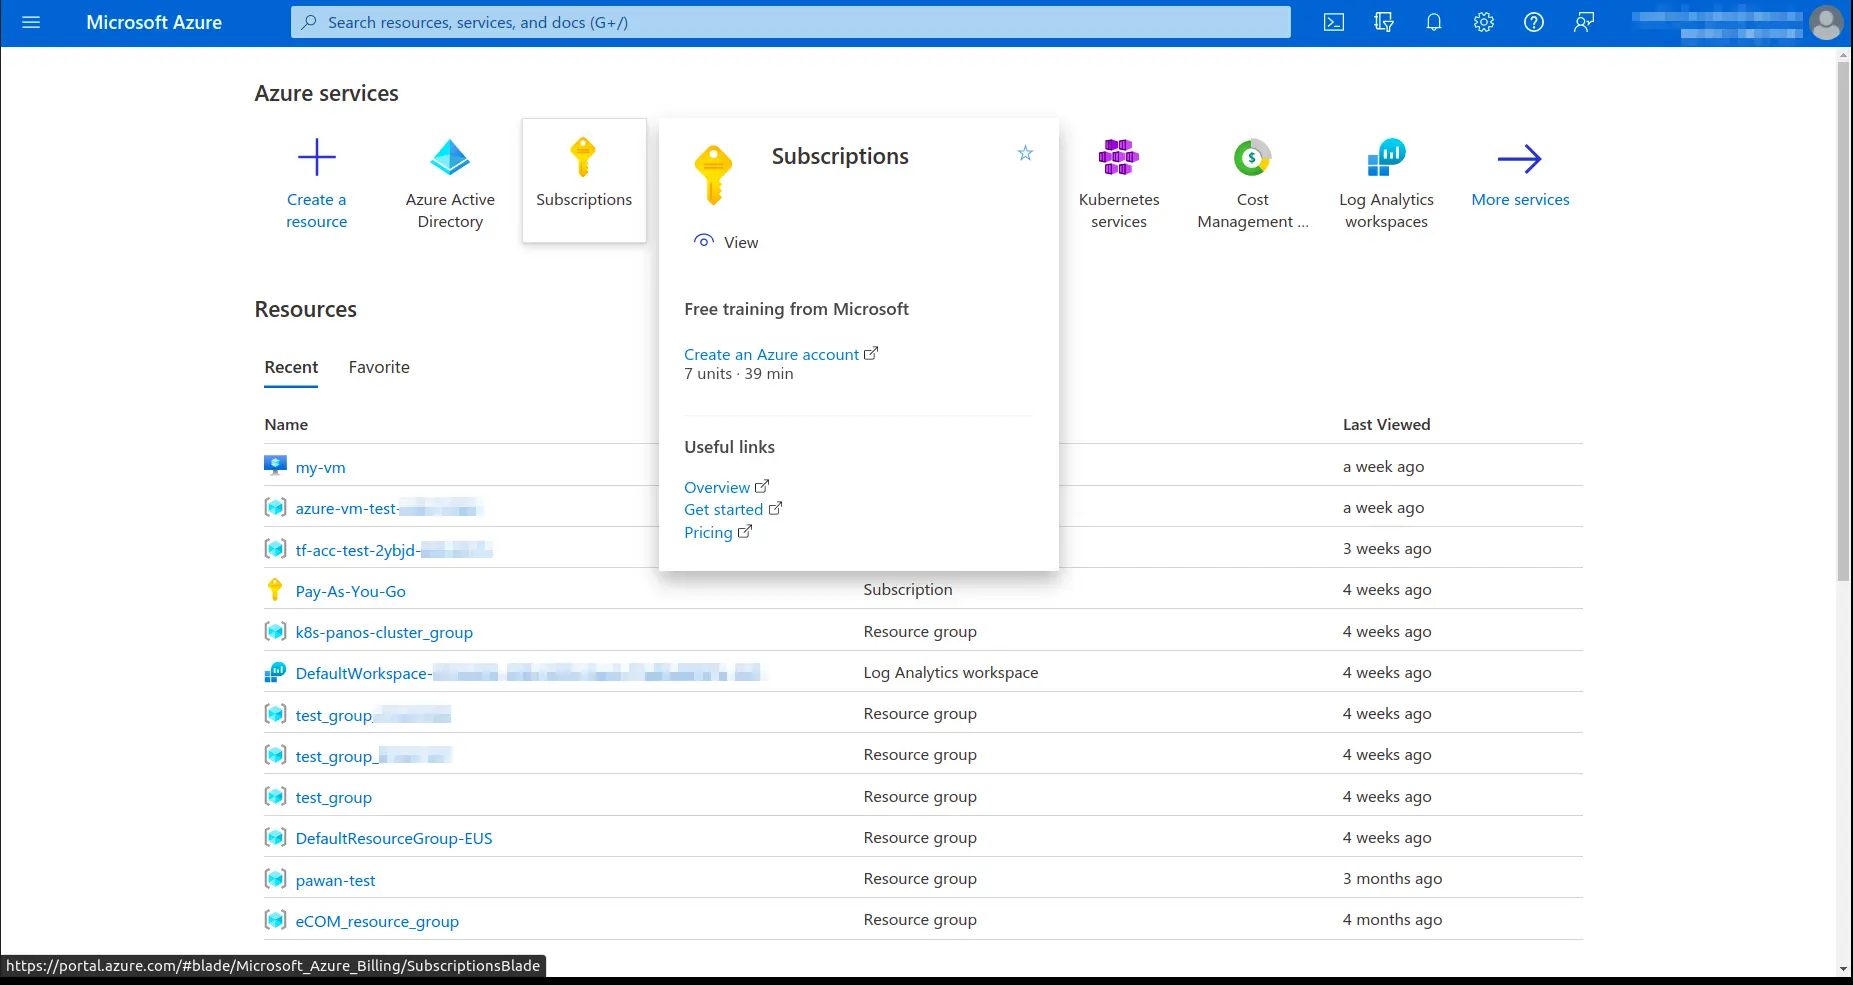
Azure Subscription

Azure Subscription ID